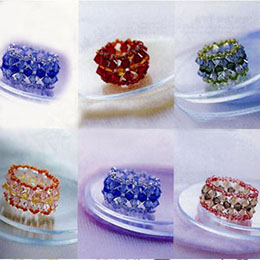
How to Make Rings from Wire and Beads
Making rings using a variety of wire and beads can be a really simple way to showcase your artistic skills and may even lead to something more lucrative for you. There are plenty of opportunities on the web that can help to expand an absorbing hobby into a successful handmade jewelry business.
As a beginner you can quickly learn the basic principles of ring making and then go on to achieve some very pleasing results. The secret to coming up with a successful product is to use a wide variety of good quality materials, and imbue them with your own artistic signature.

With a little imagination and ingenuity, you will be able to add that all important wow factor to your efforts, enabling you to turn your finished item into something totally unique and different.
For an easy to make pretty wire ring you will need some basic tools and materials such a mandrel, which is a round tapered bar made of steel, wood or plastic. This is used to give an overall ring size and an even shape. Round, nose pliers, a cutter and a needle file. You will need 12 inches of soft gauge wire (start with a cheaper option such as copper or brass, and progress to silver or gold fill wire when you are feeling a little more confident with your results) You will also need a centerpiece such as a 6 to 8 mm bead, decorative button or a polished and drilled semi precious stone.
Method:
Push the wire through the bead until the bead lies central. Push the wire down each side of the bead and then position the bead and wire against the mandrill according to the size required. Wrap the wire around and back to the top of the ring. (If using a thicker wire you will need to adjust to one size bigger)
Wrap the wire around the bead in opposite directions so that the bead has a frame of wire around it and then wrap the wire around the mandrel one more time, bringing it back to either side of the bead. You should have a double circle of wire with a coiled section around the bead.
Remove the ring from the mandrel and finish off by wrapping the ends of the wire around the ring shank twice, leaving each end 5cm free. Use the round end pliers to tweak into a pretty swirl, making sure that the point of the wire has been pinched into place to avoid injury to the wearer. The result should be a delicate ring that is light and comfortable to wear.
Variations can be made by adding extra beads of various sizes (freshwater pearls look lovely both as a cluster or solitaire) or give the shank a more robust look by wrapping around the mandrill a couple more turns or changing the type or thickness of the wire, which can be obtained in different colors and types of metal.
Different effects can be achieved by coiling the wire around the top or over the front of the bead or stone, tucking the wire around the shank or weaving in between each stand of the wire. Perhaps add a frame of tiny beads around the centerpiece or turn the bead or stone on end so that the wire protrudes from the top instead of the sides.
The great thing about this type of hobby is that there is no end of variations to what can be achieved and given a little practice you will be pleased to see just how quickly you can achieve a professional and polished look to your creations.

Comment (0)